This is a guide to general DIYer who wants to have a cheap and easy solution to improve the indoor air quality of his/her small and medium sized living space.
By forcing air through activated carbon, you can effectively "scrub" the air of organic particles and other contaminants such as dust.
This scrubbing ability is due to the ridiculously large surface area and volume ratio of carbon.
The surface area of one gram of carbon can be between 500 and 1500.
500 m² per gram, about 10 grams of activated carbon will have the surface area of the football field (
Only about 3G and 3G at 1500 m²/g)!
Someone might ask, how is this possible?
The reason for this phenomenon is a characteristic of activated carbon, the so-called micro-pores.
There are a large number of small holes in each carbon to filter pollutants.
Because activated carbon is not very lively, so it is not
Toxic and safe handling.
This relatively cheap material can be used as an effective DIY filter medium.
First of all, you have to collect all the necessary materials, the first two are the most important: Fan activated carbon (
Can be purchased online or at a local pet shop)
Window yarn, cardboard, tape, stapler/stapler, knife or scissors, thread, laces, auxiliary thread, etc. (
Anything with enough plasticity can be wrapped around the fan to measure its circumference)
In this design, the fan passes the air through the carbon filter.
That is, make sure your fan points outward (
Away from the body of the filter).
The instructions will cover inexpensive and simple designs, but can easily be adapted to more complex/durable designs.
As long as you have a good seal on the fan and filter, the same concept will apply.
First, wash the carbon off using some kind of filter or filter.
If needed, you can use the window screen inside the colander.
Usually, some small dust is removed from carbon during transportation and movement.
Then, by drying as much carbon as possible on a flat surface (
On top of plastic or something like that so it's easy to collect later). Procedure1)
Measure the circumference of the fan.
This can be done by getting your string (etc. )
Wrap it in the thickest part of the fan.
Once you wrap the rope completely around the fan, mark the length of the rope you use so that this length can be measured.
Now use your ruler or tape measure to determine the length of the rope (
Perimeter of fan). 2)
After you know the circumference, you can start measuring the cardboard you need on the fan.
We will draw a rectangle on the cardboard.
The length of the rectangle will be equal to the circumference of the fan (
A little extra for overlap)
And equal to the width of the desired length of the cardboard pipe.
On your cardboard, draw a line equal to the circumference of the fan. 25 inches. (
Additional quarterly inches allow overlap so you can create a cylinder with this cardboard. )3)
To determine the width of the pipe that should be used, measure the depth of the fan and Multiply this number by three. 4)
Cut off this rectangular piece of cardboard and roll along the grain (corrugation)
Until the material becomes malleable enough to form a cylinder. 5)
Wrap the rolled cardboard around the fan as shown in the video and fix the top off (
You try to form a cylinder).
Now remove the cardboard from the fan and nail it to the other end of the tube.
Bind this end into the cylinder we need. 6)
Before fixing the cylinder to the fan, remember that you need a way to deliver the power cord of the fan from inside the cylinder to the outside.
One way to put the plug outside is to cut a hole large enough on the side of the tube to allow the plug to sneak out.
Once the plug reaches out to the side of the tube, seal the holes around the wire with tape. 7)
Attach the cylinder to the fan with tape.
Important: Make sure your seal is very tight.
Good sealing ensures that all air pulled by the fan passes through carbon. 1)
Measure the inner diameter of the cardboard pipe attached to fan2)
Calculate the perimeter inside the tube by multiplying the inner diameter by pi (3. 1416)3)
The overlapping perimeter plus quarterly inches will be the length of the second piece of cardboard we will cut out.
The width is 1 inch.
Cut this rectangle and wrap it with tape to increase its firmness.
Form it into another cylinder (
This cylinder is only one inch high, so it is more like a disc)
Bind the upper right corner of each side together.
Next, bind the bottom corners on both sides together. 4)
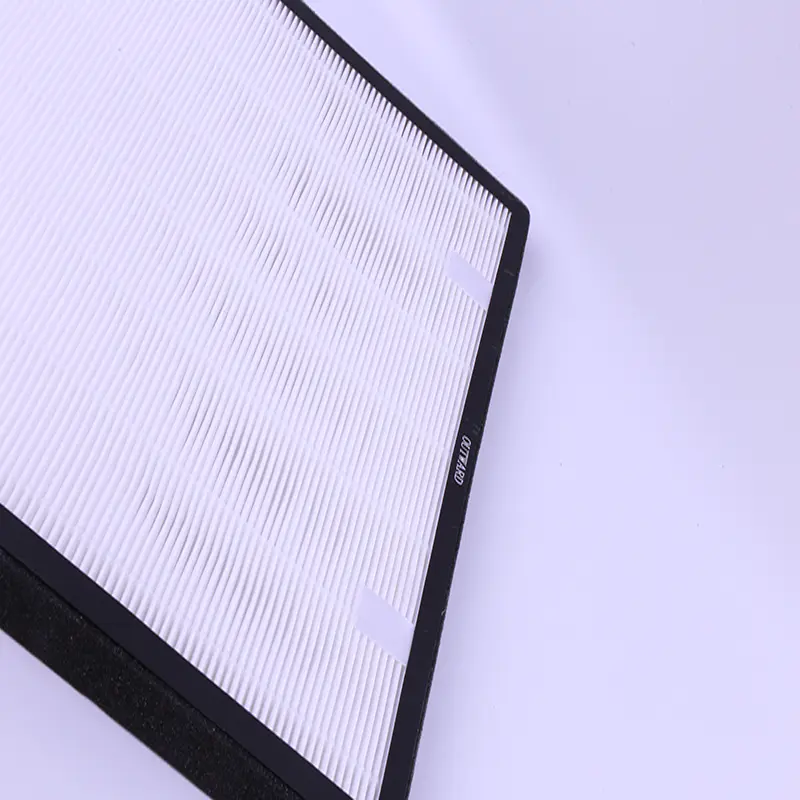
Make sure you have a good enough grid on your screen to keep the carbon in.
If not, you can double or triple the screen to reduce the mesh size. 5)
Pick up your screening material and start binding on the edge of one side of the disc (
Just like you stretch the leather on the drum).
You want the screen to be as tight as possible.
Take the time to stretch the screen on the cardboard to make sure you have a tight fit. 6)
Once you 've fully bound this part, turn the filter over and start protecting the filter to the other side.
Don't be completely sealed here;
Be sure to leave enough gaps and pour the carbon into the filter. 7)
Make sure the carbon is dry.
Once your carbon is completely dry, proceed to the next step. 8)
Make a funnel out of paper and pour the carbon into the top of the filter.
Important: fill the filter with carbon.
Doing so allows you to put the filter on the side of it (
Otherwise, the carbon will settle down over time and your filter will lose efficiency). 9)
Turn off the last part of the remaining side of the screen and trim off any excess filter material.
Now that you have built two components for the filter, they are ready to be combined and your project is almost done.
Before inserting the filter into the body connected to the fan, make sure that the switch on the back of the fan is set to on position. (
Your filter can be turned on and off by inserting/unplugging or connecting to the surge protector and using it as a switch. )
The filter can now be inserted into the cardboard tube and taped to the edges to ensure a perfect seal.
Congrats!
You now make yourself a cheap and simple air filter.
Depending on usage and indoor air quality, carbon should be replaced every six months to one year.