The purpose of this project is to design a 100% printable structure that allows to easily change the filter and work on the desk (
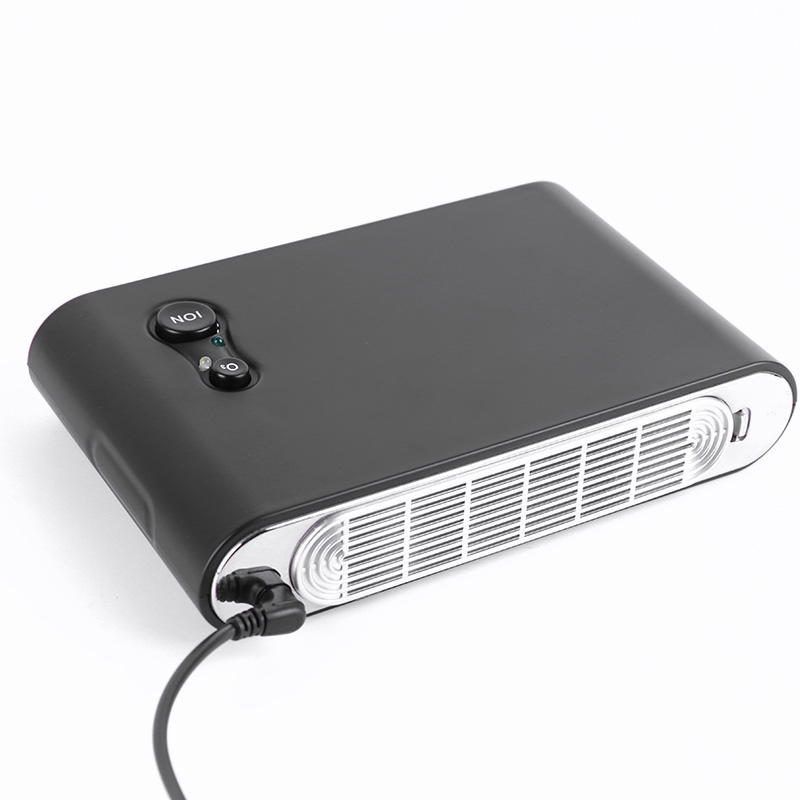
Compact and powerful USB device).
This air purifier can be used as a range hood (for soldering)
Or just an air purifier.
You will get different results by changing the type of filter.
In this note I used 2 activated carbon filters.
But it works well with HEPA filters and carbon filters (
One for each drawer).
All designed in Fusion 360.
Browser views and projects download 3D printers or friends who use 3D printers or even 3D printing services.
12x12 cm USB fan (
Or 5 V fan and USB plug)
13x13 cm activated carbon filter or Hepa filter (or other)
Height of 12x12 cm and 1 cm.
4 M4 50mm bolts and nuts4 M4 30mm bolts and nutsSoldering iron wires first of all, this is the only pla I have available in this project.
The color of salmon is sweet and light. . . Sushi style!
You need one of each part except the drawer and you need two. 1 x BODY. stl1 x FRONT. stl1 x BACK. stl2 x DRAWER.
The StlMy printing method is shown in the figure, but you can change it and find a better printing solution (
You can share in the comments
Thank you in advance :)
I have only used supports physically.
Stl and holes in the front. stl.
My print parameters: when my fan has USB installed, there are two outer layers, 0,5 nozzle0, 2mm height t5 top and lower, after installing the fan from 7% to 10% infill 60mm, I had to cut it off and weld it.
This is because you need to pass the wire through the holes designed for it.
So, cutting, wire and welding.
Your wire is bigger now (
I have 1 m long)
, Through the hole, screw the fan to the body using 4 M4 30mm bolts. stl (
Pay attention to fan airflow! ).
There's a gap between your body. stl and back.
So that you can be in (
As shown in the figure).
Weld the USB plug to the wire.
Assemble everything.
Insert the nut into the nut hole.
Stack these 3 parts and tighten them with two filters of M4 50 mmininsert, one for each drawer.
Insert each drawer into the body (
As shown in the figure).
Front drawer facing front and back drawer facing front (
This avoids the filter blocking the fan). Done!
Plug it into your laptop or any other USB source and enjoy it.
Any comments and suggestions are welcome. Thanks!